How to Inspect an RV at Pickup: Complete Walkthrough for Beginners
Updated for 2026. Inspect your RV at pickup with a complete beginner's walkthrough and documentation guide.
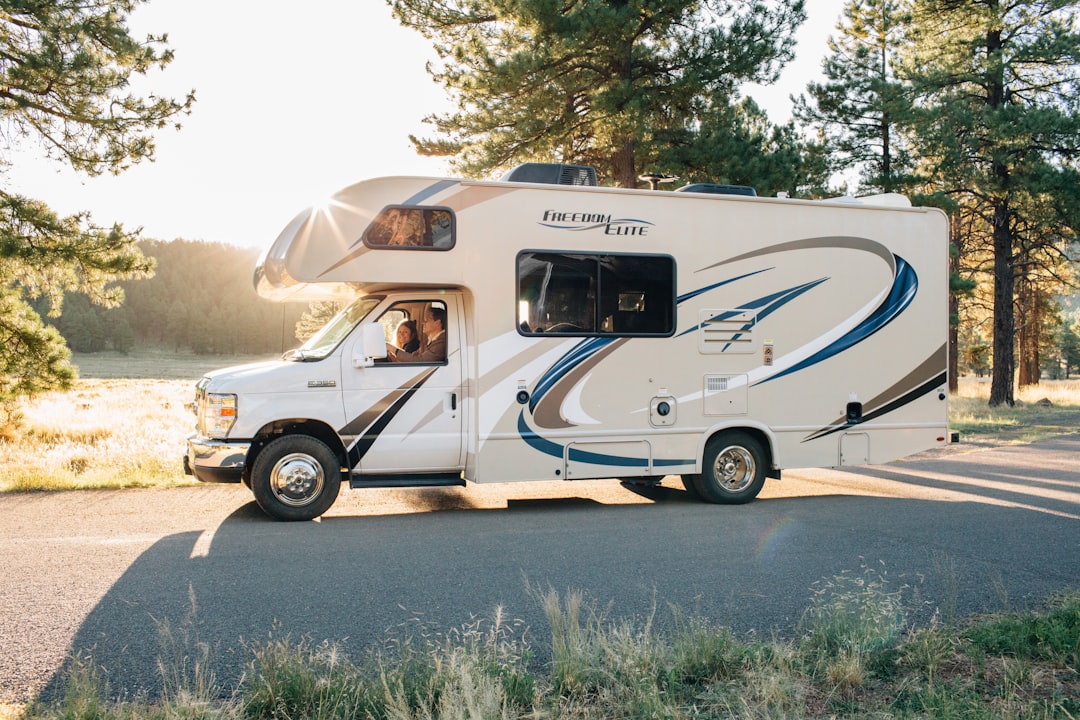
Photo by Sincerely Media on Unsplash
The moment you pick up your rented RV is exciting, but it is also the most important time to protect yourself from disputes and charges. A thorough inspection at pickup ensures you are not held responsible for pre-existing damage, and it gives you peace of mind for the duration of your trip.
Actually, here’s the thing—many first-time renters rush the inspection process because they are eager to hit the road. But spending 30-60 minutes checking the RV thoroughly can save you hours of frustration and hundreds of dollars later. I once had a customer who skipped the inspection and was charged $800 for a dent that was already there. Do not let that happen to you.
Photo by Sincerely Media on Unsplash
Before You Arrive: Prepare for the Inspection
Before you even get to the pickup location, there are a few things you should do to make the inspection go smoothly:
- Print our RV Pre-Departure Checklist: This covers most of what you need to check.
- Bring a friend or family member: Two sets of eyes are better than one. They can help check different areas simultaneously.
- Charge your phone: You will be taking lots of photos and videos—nothing is worse than a dead phone during inspection.
- Bring a flashlight: Even in daylight, some areas are hard to see without extra light—the undercarriage, storage compartments, and corners.
- Wear comfortable shoes: You will be crawling around and standing on uneven ground—leave the flip-flops at home.
Exterior Inspection: Start from the Ground Up
Begin your inspection by walking around the exterior of the RV. Take your time and check every surface carefully.
Tires:
- Check all tires for wear, cracks, and bulges—look for any damage that could cause a blowout.
- Verify tire pressure (the owner should provide the correct PSI)—underinflated tires are dangerous.
- Look at the spare tire to make sure it is properly inflated—you don’t want to be stranded without a working spare.
- Check the lug nuts to ensure they are tight—loose lug nuts can cause wheels to come off.
Body and Paint:
- Walk around the entire RV and look for scratches, dents, and chips—take photos of any existing damage.
- Check the roof for any signs of damage or leaks—run your hand along the edges to feel for soft spots.
- Inspect the slide-outs and awning for tears or damage—these are common areas for wear and tear.
- Look at the windows and windshield for cracks—even small cracks can spread.
Undercarriage:
- Check the hitch and tow components (if applicable)—make sure everything is secure.
- Look for any signs of fluid leaks—oil, transmission fluid, or coolant leaks are red flags.
- Inspect the suspension and brakes—look for worn brake pads or loose components.
- Check the dump valves and sewer connections—make sure they are clean and in good condition.
Lights:
- Have the owner turn on all exterior lights—headlights, taillights, brake lights, turn signals.
- Verify that headlights, taillights, brake lights, and turn signals all work—this is critical for safety.
- Check the marker lights and running lights—make sure they are all functioning.
Wait, should I test drive the RV before leaving?
Absolutely. Most owners expect this, and it’s your chance to check the brakes, steering, and overall handling. Take a short drive around the block or in a safe area—listen for unusual noises and feel how the RV handles.
Photo by Sincerely Media on Unsplash
Interior Inspection: Check Every Room
Once you are satisfied with the exterior, move inside and check each room systematically.
Living Area:
- Check the slide-outs to make sure they extend and retract smoothly—listen for grinding noises.
- Test the furniture for stability—sit on the couch and chairs to make sure they don’t wobble.
- Check the TV, stereo, and other entertainment systems—make sure they work.
- Verify all windows open and close properly—check for any stuck or broken latches.
Kitchen:
- Test the refrigerator (both electric and propane if applicable)—make sure it gets cold.
- Check the stove and oven—light the burners and make sure they work.
- Run the sink and check for leaks—both the faucet and under the sink.
- Test the microwave—make sure it powers on and heats food.
- Inspect all cabinets and drawers—make sure they open and close properly.
Bathroom:
- Run the toilet and check for leaks—flush it a few times to make sure it works.
- Test the sink and shower—run hot and cold water to check pressure and temperature.
- Check the hot water heater—make sure it produces hot water.
- Verify the exhaust fan works—turn it on and check that it vents properly.
Bedrooms:
- Check the mattresses for cleanliness and damage—look for stains or tears.
- Inspect the closet and storage areas—make sure they are clean and dry.
- Test the bedroom lights and outlets—make sure they work.
Storage:
- Check all exterior storage compartments—make sure they open and close properly.
- Make sure they are clean and dry inside—water damage can be hidden in storage areas.
Systems Inspection: Test Everything
The systems are the heart of the RV, so it is crucial to test them all before you drive away.
Electrical System:
- Plug in to shore power and test all outlets—use a phone charger or small appliance to verify.
- Check the battery status—make sure it’s charged.
- Test the inverter (if equipped)—this converts DC power to AC.
- Verify the generator starts and runs smoothly—listen for unusual noises.
Water System:
- Fill the fresh water tank and check for leaks—look under the RV for drips.
- Test the water pump—turn on the faucet and make sure it pressurizes.
- Run both hot and cold water at all faucets—check pressure and temperature.
- Check the water heater—make sure it produces hot water.
- Verify the water filter (if equipped)—make sure it’s clean and installed properly.
Propane System:
- Check the propane tanks for leaks using a soap solution—bubbles indicate a leak.
- Test the propane appliances (stove, oven, furnace, water heater)—make sure they ignite.
- Verify the tank level indicator works—know how much propane you have.
HVAC System:
- Test the air conditioning—turn it on and check that it cools.
- Test the furnace or heater—turn it on and check that it heats.
- Check the vents and filters—make sure they are clean and open.
Photo by Sincerely Media on Unsplash
Documentation: Get It in Writing
Before you sign any documents, make sure you have everything you need:
- Rental agreement: Read it carefully and ask about any clauses you do not understand—don’t just sign without reading.
- Insurance information: Verify coverage details and deductibles—make sure you understand what’s covered.
- Walkthrough checklist: Most owners provide one—make sure you both sign it and note any pre-existing damage.
- Photos and videos: Take photos or videos of any pre-existing damage and share them with the owner—this is your proof.
- Emergency contact information: Get the owner’s phone number and any emergency contacts—save them in your phone.
- RV manual: Ask for a copy or digital version—you’ll need it if something goes wrong.
Common Mistakes to Avoid During Inspection
Even experienced renters make mistakes during inspections. Here are the most common ones:
- Rushing the process: Take your time—this is not the time to hurry. One customer rushed through and missed a cracked windshield, which cost them $400.
- Not documenting damage: Always take photos or videos of any existing damage—photos are worth a thousand words.
- Skipping systems tests: Do not assume everything works—test it all. One renter assumed the AC worked only to find it was broken on the first hot day.
- Not asking questions: If you are unsure how something works, ask the owner—they are there to help.
- Signing without reading: Always read the rental agreement before signing—this is a legal contract.
Beginner Checklist: RV Pickup Inspection
| Step | Action | Why It Matters |
|---|---|---|
| Exterior | All tires inflated and in good condition | Prevents blowouts |
| No visible body damage (scratches, dents, chips) | Protects you from charges | |
| Roof appears intact with no leaks | Prevents water damage | |
| Slide-outs and awning work properly | Ensures functionality | |
| All exterior lights function | Safety on the road | |
| Hitch and tow components secure (if applicable) | Safe towing | |
| Interior | All appliances work (refrigerator, stove, microwave) | Comfort during trip |
| Water system has no leaks | Prevents damage | |
| Electrical outlets all working | Power for devices | |
| Furniture and bedding clean and undamaged | Comfort and hygiene | |
| Cabinets and drawers open smoothly | Convenience | |
| Toilet flushes properly | Essential functionality | |
| Systems | Propane system has no leaks | Safety |
| HVAC system works (AC and heat) | Comfort in all weather | |
| Generator starts and runs (if equipped) | Backup power | |
| Water heater produces hot water | Comfort | |
| Battery charged and functional | Power for off-grid use | |
| Documentation | Rental agreement signed by both parties | Legal protection |
| Pre-existing damage documented with photos | Proof of condition | |
| Insurance information provided | Coverage details | |
| Owner’s emergency contact info saved | Prepared for issues | |
| Walkthrough completed and understood | Know how everything works |
FAQ
Q: How long should the inspection take? A: Allow at least 30-60 minutes for a thorough inspection. If it is your first time, plan for the full hour—better to take your time than miss something.
Q: What if I find damage during the inspection? A: Point it out to the owner immediately and document it with photos. Make sure it is noted on the walkthrough checklist before you sign—this protects you from being charged later.
Q: Do I need to test the RV on the road during pickup? A: Yes, take a short test drive to check the brakes, steering, and overall handling. Most owners expect this and will suggest a route.
Q: What if something breaks after I leave pickup? A: Contact the owner immediately. Most rental agreements have procedures for reporting issues during the rental period—don’t wait until you return.
Q: Should I inspect the RV again when I return it? A: Yes, do a final walkthrough with the owner when you return. This helps avoid any disputes about new damage—document everything with photos.
The pickup inspection is your best defense against unexpected charges and disputes. Taking the time to check everything thoroughly gives you peace of mind and lets you enjoy your trip without worrying about pre-existing damage.
Remember, most owners are honest and want you to have a good experience. They expect you to inspect the RV carefully, and they will appreciate the thoroughness.
Ready to pick up your first RV? Use our RV Pre-Departure Checklist to make sure you do not miss anything during your inspection.