RV Pre-Departure Inspection Checklist Before Leaving the Campsite
Planning your first RV trip? Learn the RV pre-departure inspection checklist with beginner-friendly tips, common mistakes and practical steps.
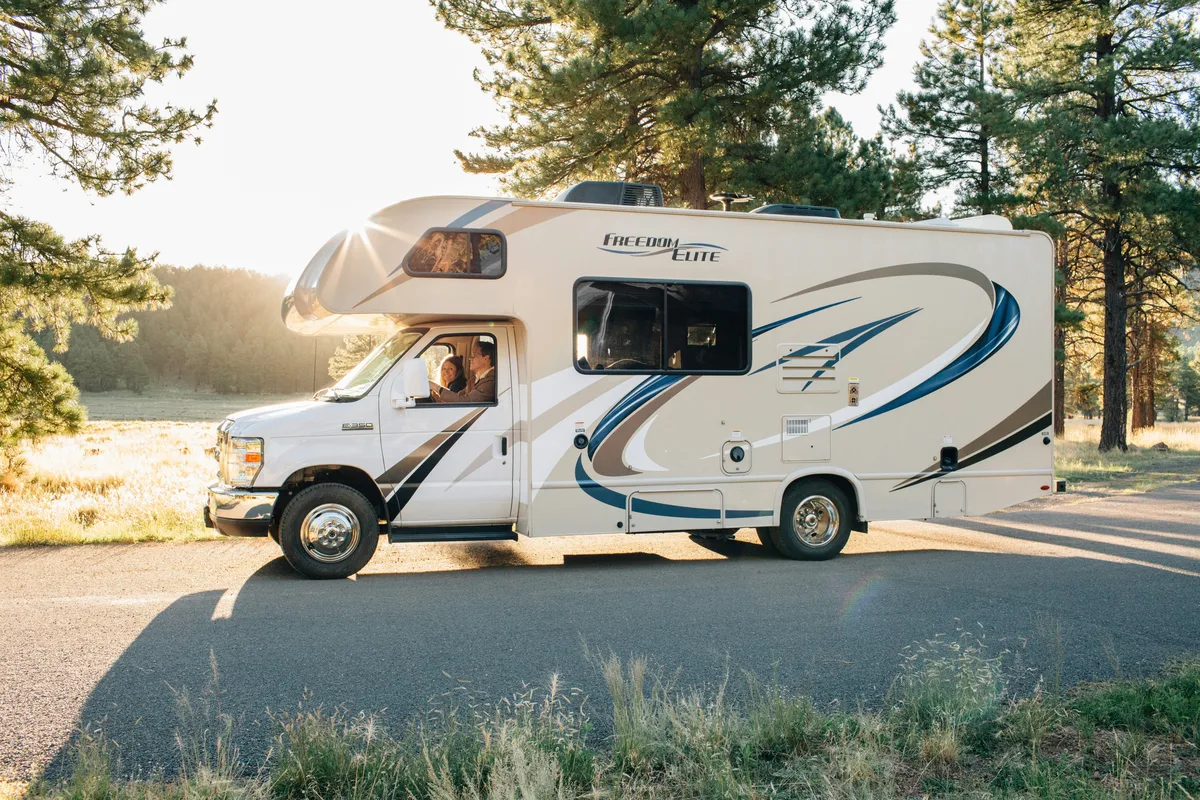
Photo by Roberto Nickson on Unsplash
Leaving a campsite sounds simple until you realize how many things can go wrong. The awning is still out. The sewer hose is still connected. The step is down. The refrigerator door swings open on the first turn. Every experienced RVer has a story about something they forgot, and most of those stories involve damage that could have been prevented with a five-minute check.
An RV pre-departure inspection checklist is the simplest way to avoid these problems. It walks you through every system that needs to be secured, stowed, or disconnected before you hit the road. First-time renters benefit the most, because the list of moving parts on an RV is far longer than anything you deal with in a car.
This guide breaks the departure process into clear steps. You will learn what to check inside the RV, what to disconnect outside, how to secure slide-outs and awnings, and which mistakes cause the most damage. By the end, you will have a repeatable routine you can run through at every campsite.

Photo by Roberto Nickson on Unsplash
Why a Pre-Departure Inspection Matters for First-Time Renters
Rental companies inspect every RV at return. If something is broken, you pay for it. The most common return damages, bent awning arms, torn slide-out seals, cracked steps, and scratched siding, almost always trace back to a departure mistake. A pre-departure checklist is your single best defense against a surprise repair bill.
The financial impact can be significant. A bent awning arm can cost $500 to $1,500 to repair. Slide-out damage often runs higher. Even a forgotten sewer hose fitting can damage the RV’s undercarriage or leave you paying for lost rental equipment. Insurance and deposits help, but most policies include deductibles and exclusions for operator error.
Beyond money, a proper departure check keeps you and other drivers safe. An unsecured cabinet door that flies open on the highway is a distraction. A loose exterior compartment that pops open can scatter gear across the road. Taking 15 minutes before you leave prevents emergencies later.
Inside the RV: Interior Pre-Departure Steps
Start your inspection inside. Most of these steps take only a few minutes, but they protect your belongings and the RV’s interior during transit.
Secure All Loose Items
Walk through the cabin and stow anything that can shift, slide, or fall. Dishes, toiletries, and pantry items should be in latched cabinets or closed bins. Loose items on the dinette, counters, or bed become projectiles during sudden stops.
- Close and latch all cabinet doors and drawers
- Store loose items in cabinets or bins
- Lock the refrigerator door and verify nothing will spill
- Stow the television if it swings freely
- Secure laptops, tablets, and valuables
- Lower or secure the dinette table if the RV recommends it
Check the Bathroom and Kitchen
Make sure the bathroom door is latched and the shower curtain is contained. Close the toilet lid and verify the bathroom fan is off. In the kitchen, confirm the stove burners are off, the oven is off, and any loose cookware is stowed.
Turn off the water pump if you have been using it. Check that all faucets are closed, because a bump in the road can open a loosely closed tap and flood the floor.
Retract Slide-Outs Before Disconnecting Power
If your RV has slide-outs, retract them while you are still plugged into shore power. Slide-out motors draw a lot of current, and running them on battery alone can drain the house system or cause the motor to struggle. Once the slides are in, you can safely disconnect power.
Follow the manufacturer’s sequence. Some RVs require the engine running to operate slides. Check the owner’s manual or your rental walkthrough notes before pressing any buttons.
Outside the RV: Exterior Pre-Departure Steps
The exterior inspection is where most departure mistakes happen. This is the part you cannot rush. Walk around the entire RV at least twice, once to disconnect and stow, and once as a final visual check.
Disconnect Utilities in the Right Order
There is a logical sequence to breaking camp. Follow it and you avoid spills, shocks, and messes.
- Disconnect sewer first. Close the black tank valve, dump the black tank, then dump the gray tank. The gray water helps flush the sewer hose. Rinse the hose, cap it, and store it in its designated compartment, away from fresh water gear.
- Disconnect the water hose. Turn off the campground water supply, disconnect your drinking water hose, drain it, and store it separately from the sewer hose.
- Disconnect power last. Turn off the breaker at the pedestal, unplug the power cord, and store it in the power compartment. This prevents arcing and protects your RV’s electrical system.
Stow Outdoor Gear
Pack up everything you set up at the campsite. A quick mental inventory helps.
- Retract the awning fully and lock the travel arms
- Bring in camping chairs, tables, and rugs
- Pick up the outdoor mat and shake it clean
- Stow the grill, fire pit, or outdoor kitchen items
- Collect toys, bikes, and pet gear
- Check the fire ring is fully extinguished
- Pick up all trash and dispose of it properly
Retract the Antenna and Satellites
If you raised a TV antenna or set up a satellite dish, retract and stow it now. Driving with an antenna up is a common cause of roof damage. Double-check that the antenna crank or switch is in the travel position.
Securing the RV for Travel
Once utilities and gear are stowed, focus on the mechanical systems that keep the RV safe on the road.
Raise Leveling Jacks and Blocks
If you used leveling blocks under the wheels, remove them before driving. If the RV has hydraulic or electric leveling jacks, retract them fully and verify the warning indicator is off. Driving with jacks down can damage the system and create a dangerous dragging hazard.
Raise the Entry Step
The entry step should be folded up and locked for travel. A step left down will scrape on driveways and speed bumps, and it can bend the mounting bracket beyond repair. Some motorized RVs retract the step automatically when the engine starts, but always confirm visually.
Check Tire Condition
Walk around and visually inspect all tires, including the spare if accessible. Look for obvious low pressure, debris embedded in the tread, or damage to the sidewall. If your rental includes a tire pressure monitoring system, verify all tires are reading within the normal range before you drive.
Verify Lights and Signals
Before pulling out, do a quick light check. Turn on the headlights, taillights, brake lights, and turn signals. If you have a travel partner, ask them to watch from outside. If you are alone, check your mirrors for brake lights and use a reflective surface or wall to confirm headlights and signals.
The Final Walk-Around
After everything is stowed and secured, do one full lap around the RV. This is your last chance to catch something before it becomes a problem at 60 miles per hour.
- All compartments are closed and locked
- All hoses and cords are stored
- The awning is fully retracted and locked
- The step is up
- Leveling jacks or blocks are removed
- Slide-outs are fully retracted and sealed
- No gear is stored on the roof or ladder
- The sewer cap is in place
- Nothing is leaning against the RV exterior
- The area under and around the RV is clear
For a guided version you can run through on your phone, use our RV pre-departure checklist tool before every departure. When you arrive at your next site, our RV campsite setup checklist walks you through the reverse process for a smooth arrival. If you are still learning the rental process from scratch, start with our complete beginner guide to renting an RV.
Common Beginner Mistakes at Departure
- Forgetting to retract the awning: The single most expensive departure mistake. Wind catches the fabric and rips the arm off the wall.
- Dumping the gray tank before the black tank: Gray water flushes the hose. Reversing the order leaves solids behind and creates odor.
- Leaving the step down: The step scrapes on the first driveway exit and bends the mounting bracket.
- Driving with a compartment open: Gear flies out on the highway, creating a hazard for other drivers.
- Disconnecting power before retracting slides: Slide motors strain on battery power and can blow a fuse or drain the house system.
- Rushing the final walk-around: Most damage happens when the driver is eager to get on the road and skips the last lap.
Practical Pre-Departure Checklist
Run through this list at every campsite before you drive away:
- All cabinet doors and drawers latched
- Refrigerator door locked and contents secured
- Stove and oven off
- Water pump off and faucets closed
- Slide-outs fully retracted
- Black tank dumped, then gray tank dumped
- Sewer hose rinsed, capped, and stored away from fresh water gear
- Water hose disconnected, drained, and stored
- Power cord disconnected and stored after breaker is off
- Awning fully retracted and travel arms locked
- Antenna or satellite stowed
- Leveling jacks retracted and blocks removed
- Entry step raised and locked
- Tires visually inspected for pressure and damage
- Lights and turn signals checked
- All exterior compartments closed and locked
- All outdoor gear stowed
- Trash disposed of and fire ring extinguished
- Final full walk-around completed
Building a Departure Routine That Sticks
The first few departures will feel slow. That is normal. The goal is to turn the checklist into muscle memory so that eventually you do not need to think about each step. Most experienced RVers develop a personal sequence, interior first, then utilities, then exterior gear, then the final walk-around, and they stick with it every time.
If you travel with a partner, split the duties. One person handles the interior while the other handles utilities and exterior gear. Meet at the end for the final walk-around together. A second set of eyes catches things one person alone will miss.
Print the checklist and tape it inside a cabinet door near the entry. Keep a digital version on your phone as backup. The few minutes you spend on departure inspection save hours of dealing with damage, lost gear, or roadside emergencies later.
Conclusion
An RV pre-departure inspection checklist is not busywork. It is the difference between a smooth exit and a costly repair bill. Every step, from retracting the awning to dumping tanks in the right order, exists because someone learned the hard way what happens when it gets skipped. Run through the checklist above at every campsite, take your time on the final walk-around, and you will return your rental in the same condition you picked it up. For more help planning every stage of your trip, explore our RV pre-departure checklist tool and pair it with our RV campsite setup checklist for a complete arrival and departure routine.
Disclaimer: This guide offers general beginner educational information only. Complex RV mechanical maintenance, repairs and safety adjustments should be completed by certified RV professionals. Always follow your RV rental company and vehicle manufacturer instructions.
Quick answers